I built the factory rib on perfboard and stuck in in the MX chassis so it looks nice
setting next to the keyloader in the briefcase.
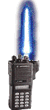
The only modification to the rib was a BLUE LED that is voltage calibrated with seven 1N914 diodes in series. This works excellent
As it is set to the threshold of ONE Shorted cell in an MX battery pack. So a fully charged "One cell bad" battery will NOT light the LED at 7.5 Volts. A fully charged "Good" Battery mesures 8.2 Volts and will light up the Blue LED to a Very Nice Brightness.
One cell shorted in a battery pack is probably the most common of all battery falures. And depending on the radio, may be difficult to even notice by the casual user.
Of course the Rib also has an internal 9V Duracell. The 9v is activated by the channel switch.
The MX Batt is activated with the normal On/off vol control. Both Batteries can be used at once however It will draw from the 9V a little more as It's Open circuit Voltage is a little higher.
Plugging it in will result in a slow charge to the MX Batt, and rectify the above mentioned 9V kill.
A new Top plate Around the DB25 connector can be fashioned out of a PC ISA card with a DB25 on it.
I used a serial/printer card from a 8088 computer that i had laying around.
The Speaker/mic connector was used as is for the rs-232 connection to the computer. Just made an MX to DB9 cable. Dont plug that into the keyloader!!!
I'd post a pic, But I don't have a camera handy and besides- It looks just like an MX300 with a DB25 on top anyway.
Finally of course a WARNING:
THIS WORKED PERFECTLY THE VERY FIRST TIME. IF YOU CAN NOT ASSURE YOURSELF OF THE SAME,
DO NOT ATTEMPT TO BUILD A RIB.
YOU WILL DESTROY THE RADIO YOU ARE TRYING TO PROGRAM!!!!
P.S. Beta Matching the Transistors on a curve tracer or even a DVM, and 1% metal film resistors is a good idea if U can do it.